Charred Eggplant & Chickpea ‘Maghmour’

This is a hearty vegan dish made with charred eggplants and chickpeas; cooked in a savory and garlicky tomato sauce.

This recipe is called Maghmour. It’s made with a few humble ingredients but with the right technique you’ll end up with a dish that’s packed with flavor that is sure to become one of your favorite go-to recipes.

INGREDIENTS

  • 1 eggplant (around 0.5 kg)
  • 0.5 cup olive oil
  • 2 medium yellow onions, finely sliced
  • 8 large cloves garlic, finely sliced
  • 2 green chilies, finely chopped
  • 6 tbsp tomato paste
  • 2 cups cooked chickpeas
  • 3 cups warm water
  • 2-3 tsp salt

METHOD

  1. Peel the eggplants (partially or completely) and cut them into large disks, around 2 cm thick. Place the eggplants in a colander, add 2 tsp salt, toss and leave for 30 mins to extract the water from the eggplants. This might seem like a lot of salt, but the salt will draw out a lot of water from the eggplant. The water will wash away most of the salt, leaving behind eggplants that have been seasoned not just on the surface but on the inside as well.
  2. Pat the eggplants dry (to reduce splatter) then shallow fry them on both side in olive oil in a pan on high heat till they take some color, then remove and set aside on a paper towel.
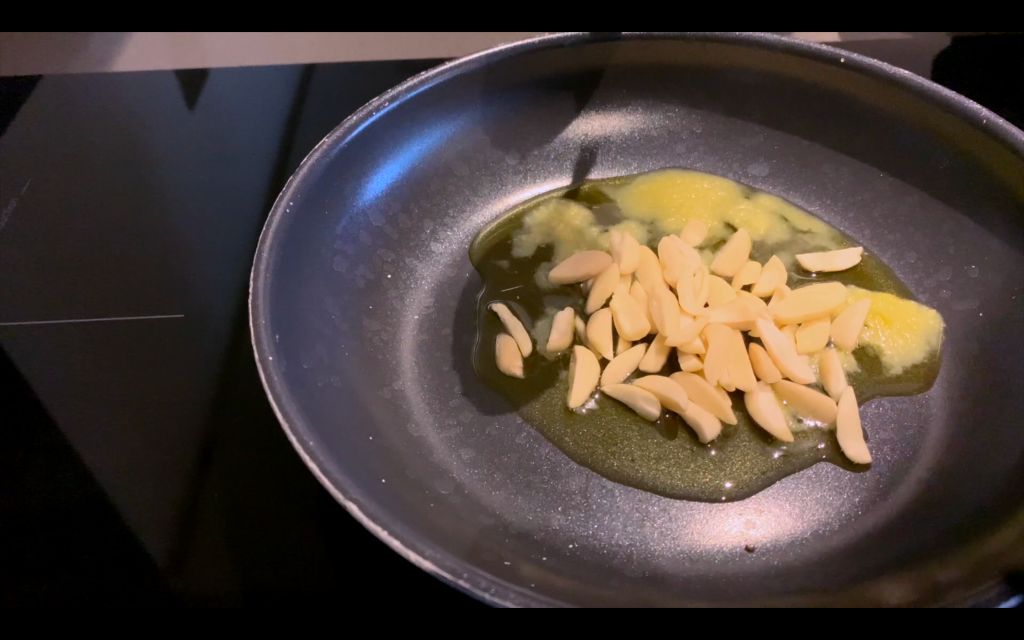
  3. The key to making a rich sauce is infusing the flavor of the aromatics in the oil. In the same pan, add the sliced onion, 0.5 cup of olive oil and 2 tsp salt and cook on low heat till they wilt without taking color. Then push the onion to the side, add the sliced garlic and chili and cook on low heat to infuse the oil about 5-10 mins. The garlic will be slightly browned adding a rich umami flavor.
  4. Then, toss everything together and push them again to the side of the pan.
  5. Add the tomato paste and cook for a few mins to concentrate its natural sugars and boost its savory flavor.
  6. Add the cooked chickpeas (you can use canned chickpeas or dried chickpeas that you have previously soaked and boiled), toss everything together and cook for an additional 5 mins.
  7. Add the warm water and bring the pan to a boil, then decrease the heat to low and let it simmer covered (but very slightly cracked open) for 30 mins.
  8. After 30 mins, taste and adjust the sauce for seasoning. Then, add the eggplant pieces and nestle them into the sauce. Cover again and cook on low heat for 10-15 mins.
  9. Turn the heat off and keep them covered for an additional 10 mins to steam to make sure the eggplants get really soft.
  10. Serve with flatbread, fresh slices of bell pepper and sweet white onion wedges.

Lentil Mujaddara Safra (3-ingredient vegan recipe)

Mujaddara is a family of lentil-based dishes and Mujaddara Safra is one type that uses red split lentils as its main ingredient.

Safra means yellow referring to the vibrant yellow color the lentils take when cooked.

The first recorded recipe of Mujaddara dates back to the book Kitab al-Tabikh in 1226 AD. The original recipe was made with lentils, rice and meat and it was served at both celebrations, and when cooked without the meat, as working-class meals. In the medieval world, rice was generally more expensive than lentils so poorer people tended to cook with more legumes in proportion to rice. The recipe for mujaddara has evolved a lot and the version we are sharing today is very common where we grew up in Southern Lebanon!

INGREDIENTS

  • Mujaddara Safra
    • 1.5 cups red split lentils
    • 6 cups water
    • 1 large (or 2 medium) onions
    • 3-4 tbsp olive oil
    • 1.5 – 2 tsp salt
  • Cucumber-Tomato Salad
    • 1 medium cucumber
    • 2 medium tomatoes
    • juice of 1 lemon
    • 0.5 tsp Aleppo pepper (optional)
    • 0.5 tsp salt
    • generous drizzle of olive oil

METHOD

  1. Measure 1.5 cups of red split lentils and wash them well then drain the murky water. Do this several times until the water runs clear. (Some recipes call for adding some rice to the lentils which would be done at this stage, but we personally prefer it without the rice.)
  2. Put the lentils in a pot, add 6 cups of water and bring to a boil. Once the water starts boiling, lower the heat and let the lentils cook for about 40 mins. Every now and then, skim the white foam that rises to the surface.
  3. While the lentils cook, chop the onions and fry them in olive oil till they reach a light golden color. Add 0.5 tsp of salt here to help the onions cook.
  4. At this point the lentils have been cooking for about 40 mins until they have broken down completely. Add in the onions with the oil over the lentils, give it a good stir and let them cook for another 20 mins for the flavours to come together.
  5. In the meantime, to prepare the salad, dice the cucumber and tomatoes, add the lemon juice, Aleppo pepper (if using), salt and olive oil. Mix it up and the salad is ready. (Make sure the cucumber and tomato are pre-chilled so the salad remains cold and fresh)
  6. By this time, the lentils have been cooking for about an hour. They’re thick and creamy. You want the consistency to be a bit thinner than the final result. That’s because the mujaddara will thicken once it sets. So adjust the consistency with a some water, if necessary. Season with 1-1.5 tsp salt. Give it a good stir, taste for seasoning and adjust and the mujaddara safra is ready!
  7. Serve it warm with flatbread and the tangy cucumber-tomato salad. You can also serve this dish with radishes, olives, and pickles on the side. Some also like to add a dash of cumin on the lentils.

Anise and Sesame Cookies (Maakroon)

These Levantine home-style cookies with anise and sesame seeds are called Maakroons. Not the French Macarons. But Maakroons. Anise is a common ingredient used in the Levant to flavor breads and baked goods. It has a taste somewhat similar to licorice and fennel. These cookies are crunchy and not too sweet and they go perfectly well with your morning coffee or tea. On top of that, they are easy and real fun to make.

INGREDIENTS

  • 2 cups all-purpose flour
  • 1 tsp baking powder
  • 0.25 tsp salt
  • 6 tbsp vegetable oil
  • 2 tbsp olive oil
  • 1.5 tbsp butter (room temperature)
  • 0.6 cup sugar
  • 2 tbsp black sesame seeds (toasted)
  • 2 tbsp white sesame seeds (toasted)
  • 2 tbsp aniseeds (infused in 0.3 cup water)

METHOD

  1. In a small saucepan, start by boiling the anise seeds with 0.3 cup water for a few minutes. Then turn off the heat and let the anise seeds sit in the water to cool down.
  2. In a large mixing bowl, add the flour, baking powder, salt, vegetable oil, olive oil and butter. Mix well to combine and knead for a few mins.
  3. Add the sugar and knead to combine.
  4. Add the black sesame seeds, white sesame seeds and anise infused water (both the aniseeds and their water) and knead one last time.
  5. The ratio of oil to water that we used in the dough is what will give these maakroons their crumbly texture rather than a doughy texture. Higher oil to water content will give us this crumbly texture that we are after. More water in dough and the cookies will become naturally doughier and less crumbly, which is not what we’re after with these maakroons. So we want to keep the water at minimum. But we might need to add a bit more for the dough to come together. So start by adding 1 tbsp of water at a time and knead the dough and if it’s still not coming together, add another tbsp. of water and knead. (we used 2 tbsp)
  6. Cover the dough with cling film and let it rest for 45 mins.
  7. After 45 mins, remove the cling film and form the dough into balls, about 25g each. Then, roll each ball into a short cylinder and press that onto a cheese grater or colander (oiled a bit to avoid having the dough stick) to get a pattern on the dough. Gently then, roll the dough backwards to remove it off the grater or colander and place on a tray to go into the oven.
  8. Bake these cookies in a pre-heated oven at 200 deg Celsius for 13-14 mins or until lightly golden. Let them cool for a few mins and enjoy with coffee or tea!

Fragrant Milk Pudding flavored with Mastic (Muhallabia)

Muhallabia is a fragrant Middle Eastern milk pudding flavored with Mastic, orange blossom water & rose water. It is slightly sweetened, rich, creamy and super easy to make.

In this recipe, we flavor our milk pudding with Mastic. It is a resin produced by a tree native to the Mediterranean basin, particularly the island of Chios in Greece. When it falls from the tree, mastic resin resembles tear drops, which is why they’re often referred to as the Tears of Chios.

During the Ottoman rule in the 1800s, mastic resin was so valuable that it was worth its weight in gold. Mastic resin is sticky and chewy and is often used as a natural chewing gum, its distinct flavor and aroma is similar to pine or cedar. To use it in cooking, we need to first grind it into a fine powder. We usually leave our mastic in the freezer. When frozen, mastic is much easier to crush into powder.

INGREDIENTS

  • 4 cups full-fat organic cow milk
  • 1 cup cream (optional – if not using, replace with 1 cup milk)
  • 0.5 cup cornstarch
  • 0.75 cup sugar
  • 0.25 tsp mastic (frozen then crushed to powder)
  • 2 tsp rose water
  • 2 tsp orange blossom water
  • Garnish:
    • pistachios, crushed or powdered
    • pomegranate seeds

METHOD

  1. Put the milk, cream (if using) and cornflour in a small pot. Place over a medium-high heat and start whisking fast to dissolve the cornstarch properly while the milk is still cold otherwise it’ll leave you lumps in the pudding.
  2. After the cornstarch has been completely dissolved, you can now continue whisking slowly making sure you get the sides and the bottom of the pot.
  3. After a few mins, when the milk is warm, reduce the heat to low, add the sugar and ground mastic and continue stirring constantly for 3-5 minutes or until the milk thickens.
  4. When the milk has thickened, add the rose water and orange blossom water and continue cooking the pudding, still whisking, for another 1-2 mins.
  5. Turn off the heat, pour into small bowls or ramequins. Let the milk pudding cool down then chill in the fridge for a few hours.
  6. Garnish and serve slightly chilled.

REMARKS

Always use rose water and orange blossom water sparingly. These condiments are quite concentrated and a few drops too much will leave a bitter unpleasant taste in the food.

How to Make Labneh (Strained Yogurt) – 3 Ways

Strained yogurt or Labneh, is a classic Levantine breakfast. Due to its resemblance to cream cheese in texture, Labneh is often confused with cheese but it’s not. It’s really just yogurt that has been strained overnight to allow the whey to drain out leaving us with this dense and creamy dip. Labneh has the tartness of yogurt, which makes it refreshing!

INGREDIENTS

  • 1 kg yogurt
  • 1 tsp salt

METHOD

Lay a cheesecloth over a medium size bowl and pour 1 kg of yogurt in. It’s really important to start with the best quality full fat, organic live culture yogurt that you can find!

Hold the ends of the cheesecloth and tie a knot to hold the yogurt in then tie that to the faucet and let it hang (from the faucet) overnight to drain off the liquid whey in the yogurt. Basically we’re using its weight to get the liquid whey out. You can control the thickness of your Labneh dip by increasing or decreasing the time it’s left suspended from the faucet. We usually leave our about 8-10 hours.

Next day! Remove the pouch, open it and get the labneh out into a bowl. Add a teaspoon of fine sea salt and mix well to combine. And the labneh is ready! It’s nicely seasoned, dense and thick with a rich creamy and slightly tangy flavor. Labneh works great as a dip or as a spread on sandwiches and pairs very well both with sweet and savory flavors.

Serving Suggestions:

  • Classic version: just spread some labneh in a small bowl, add a drizzle of extra virgin olive oil and serve with some fresh tomato, cucumber, mint and some olives.
  • Garlic-mint version: Mince 1 small garlic clove and add it to about 1 cup of labneh. Add 2 tsp of dried mint. Mix well to combine then spread, add finish with a drizzle of extra virgin olive oil.
  • Pistachio-apricot-honey: To about a cup of labneh, add 2 tbsp of chopped apricots and 2 tbsp chopped pistachios and mix well to combine. Spread and drizzle with good honey and enjoy.

Yogurt Chickpea Fatteh

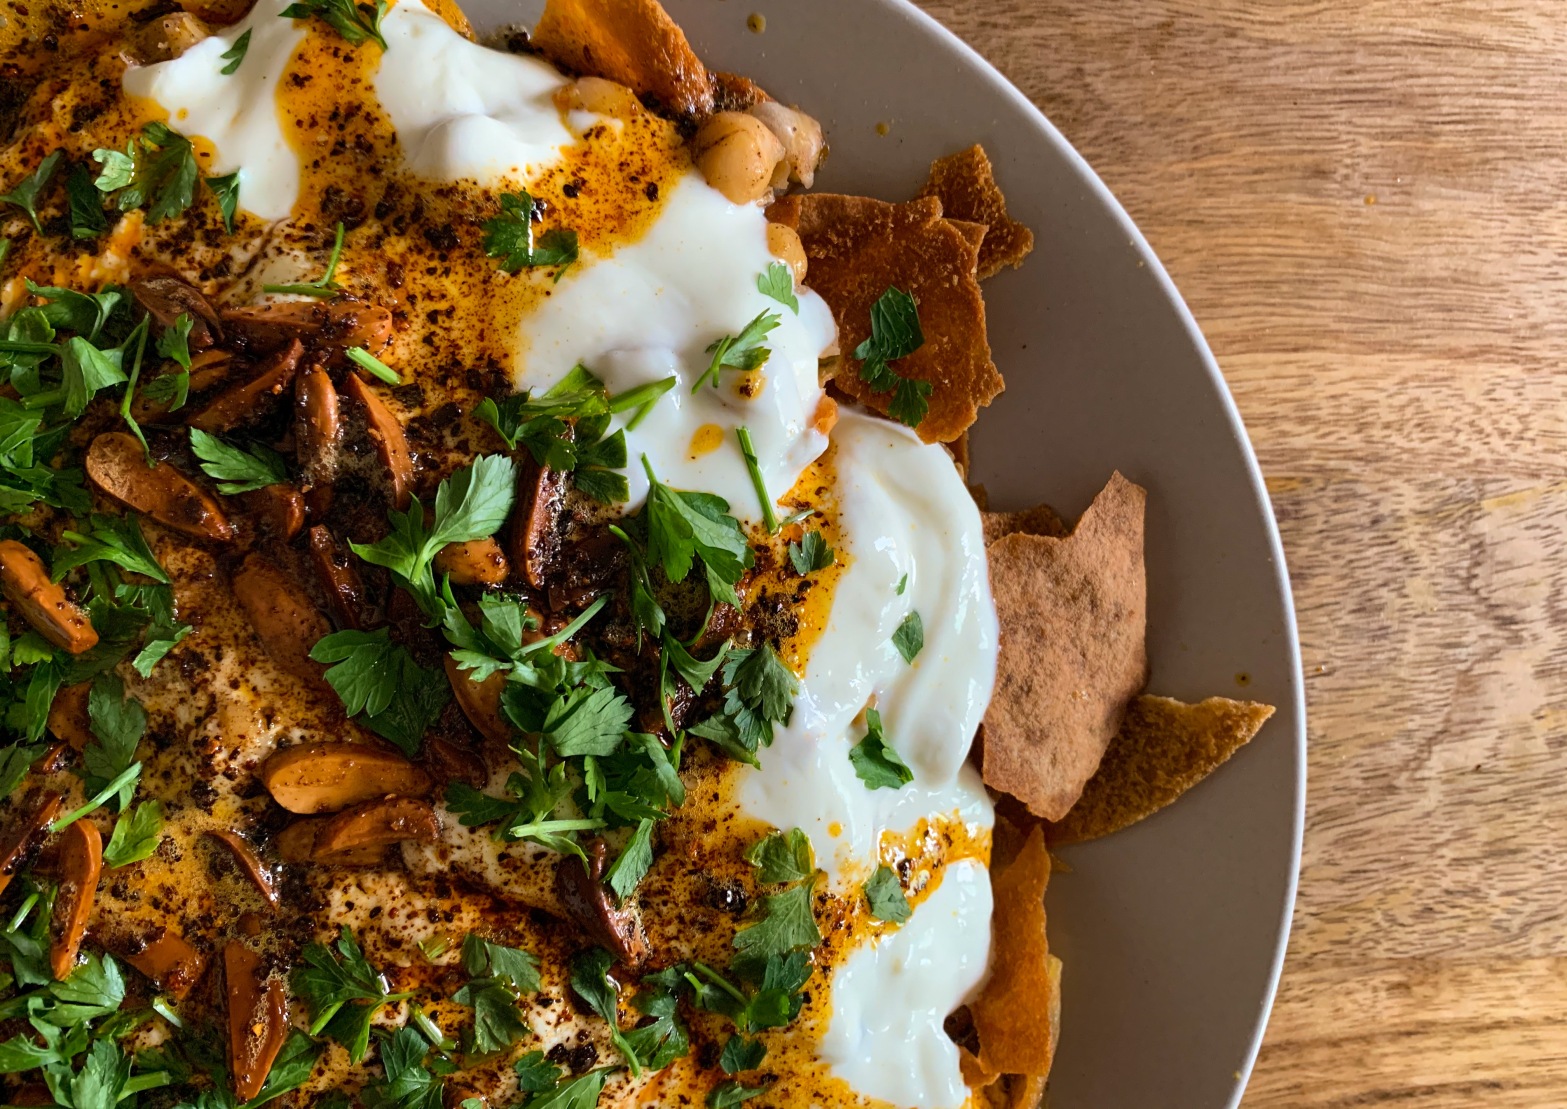
Today we are sharing this delicious classic dish from the Levant: yoghurt chickpea fatteh. The combination of toasted bread, seasoned chickpeas, garlic yogurt and this sizzling hot finish of ghee or butter make fatteh a personal favorite hummus recipe.

INGREDIENTS

  • 1 flatbread, medium size
  • 2 tbsp extra virgin olive oil
  • parsley, finely chopped for garnish (optional)
  • Seasoned yogurt
    • 2 cups yogurt
    • 1 garlic clove
    • 0.5 tsp salt
  • Seasoned chickpeas
    • 1.5 – 2 cups cooked chickpeas, warm
    • 1 tsp three-spice powder *
    • 0.5 tsp salt
  • Ghee finish
    • 2 tbsp ghee
    • 2 tbsp slivered almonds
    • 0.5-1 tsp Aleppo pepper (optional)

* Three-spice powder: This is cinnamon, black pepper and all spice.To make this yourself, grind each spice separately into a powder and then mix them in the following quantities:
2 parts cinnamon + 1 part black pepper + 1 part all spice.

METHOD

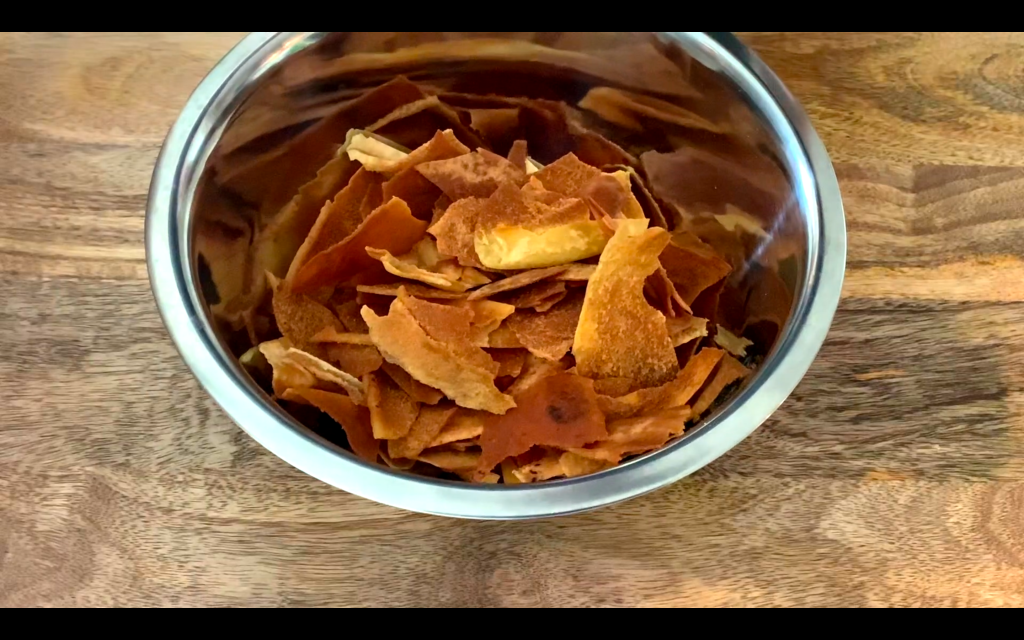
  1. Bread: We are using one medium sized flatbread. Flatbread works best for fatteh and is quite easy to find these days especially in Middle Eastern Supermarkets. Open the bread at the seam and brush the inner part with olive oil. Then, toast it in a preheated oven under the grill at 200 degrees Celsius. Just make sure to keep turning it under the grill so it toasts evenly. When the bread is done, take it out, let it cool down and then break it into bite size pieces.
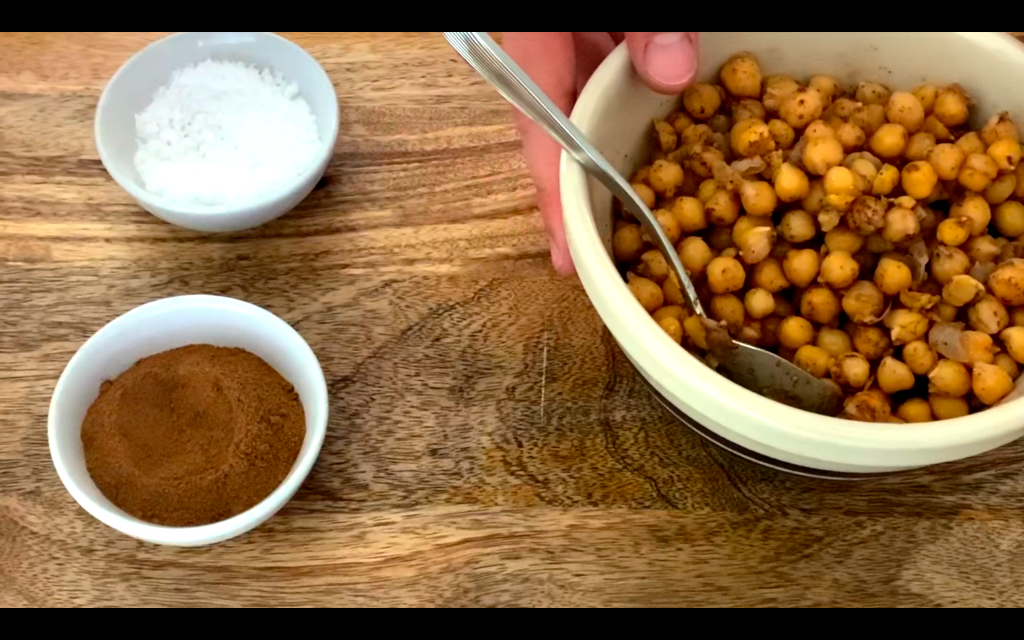
  2. Seasoned chickpeas: we started with dried chickpeas that we soaked and boiled. If you’d like to learn how to do that, you can check out our video on that. It’s always best to prepare dried chickpeas yourself but if you are using canned, just wash them well , put them in a pot, cover with water, toss in a cinnamon stick, bring them to a medium simmer and cook for 20 minutes until they become warm and soft. When ready, strain the chickpeas out of the water then add the three-spice powder and salt and mix.
  3. Seasoned yogurt: mince a garlic clove with some salt and then add them to the yogurt and stir to mix well. Make sure here to taste the yogurt – which has to be nicely seasoned and garlicky. If it needs for more salt, just add another pinch and mix. The yogurt also has to be chilled to give us this contrast in temperatures in this dish.
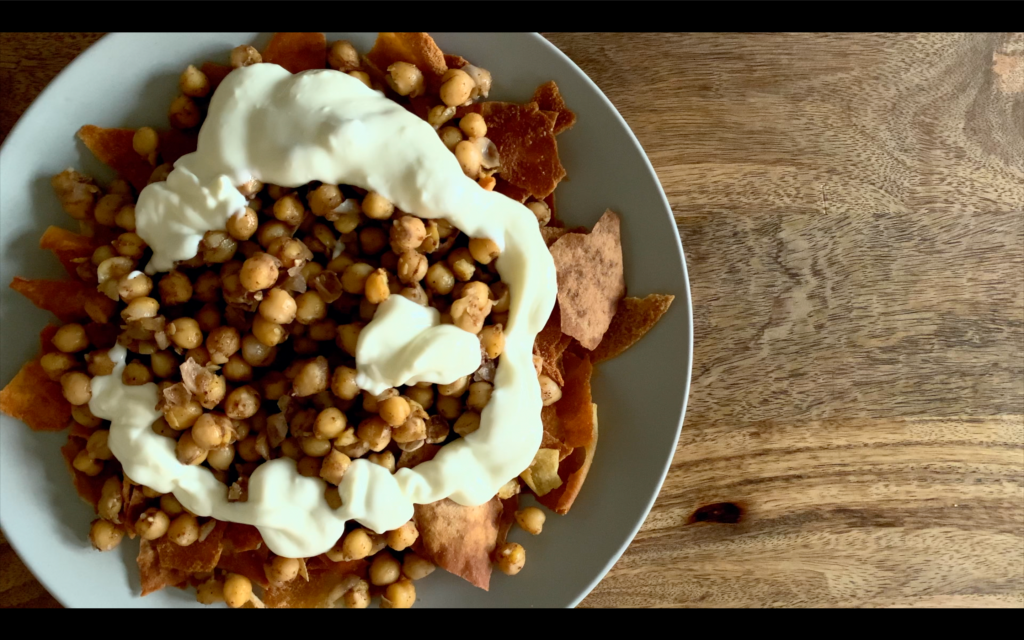
  4. Assembly: layer the bottom of the plate with the crushed toasted bread. Add on top the seasoned chickpeas followed by the garlic-yogurt.
  5. Ghee finish: in a small saucepan, add the ghee and the slivered almonds and toast on medium heat till they are nicely golden. Turn off the heat and add the Aleppo pepper, if using. It’ll foam a bit. Then, pour the hot ghee mixture over the cold yogurt and hear it sizzle! Aleppo pepper is a mild and bright red pepper with fruity notes. Aleppo pepper here is totally optional.
  6. Alternatively, you can also toast pine nuts in some butter. Almonds just take more time to toast than pine nuts that’s why ghee works better here because it has a higher smoking point. Pine nuts, however toast quickly so butter is ok. Just make sure not to brown the butter because that’ll change the flavor.
  7. Garnish: garnish with chopped parsley and serve immediately.

How to Prepare Dried Chickpeas

Today, we’re gonna show you how to prepare dried chickpeas in a simple easy step by step tutorial. While there are various methods out there on this subject, this is certainly our preferred way to always get the best evenly cooked soft chickpeas.

Chickpeas are a healthy and versatile ingredient very common in the Levant. There are these small breakfast shops that only sell chickpea and bean dishes. They normally have a very big pot of chickpeas that’s simmering gently from which they prepare a variety of delicious breakfast dishes. And we’ll try to cover some of these recipes in future videos!

INGREDIENTS

  • 500 g dried chickpeas
  • 1 cinnamon stick
  • 1 tbsp coarse sea salt
  • 1 tbsp baking soda

METHOD

  1. Soak the chickpeas in water for 2-3 hours.The water will get murky and yellow. Pour it off, rinse the chickpeas with clean water then soak again – in double their amount by volume – of water and coarse salt for 10-12 hours. The salt helps break down the outer skin of the chickpeas and make it softer.
  2. Then, pour off the chickpeas and their water into a colander. Wash, then sprinkle with baking soda, toss and let the chickpeas sit in the colander in baking soda for 15 minutes. Baking soda helps soften the skin of chickpeas. It also makes the chickpeas more digestible and decreases bloating.
  3. After 15 mins, wash the chickpeas very well from the baking soda and put them in a pot with 1 cinnamon stick. Cover with water – double their amount by volume.
  4. Bring the pot to a boil then simmer covered or semi-covered (to avoid having the scum from the chickpeas spill out of the pot) on low heat for about 45-90 mins or until the chickpeas are nicely soft. Different chickpeas take different time to cook so it’s good to test them every now and then.
  5. Skim the scum that rises to the surface.
  6. When the chickpeas are done, they should easily squish between your fingers.
  7. With a strainer, take the chickpeas out and they are ready to use.
  8. While it may seem convenient to use canned chickpeas, dried chickpeas are greatly superior in taste, quality and nutritional value. And also, chickpeas freeze very well so you can freeze some after they cool down in ziplock bags, both whole or as paste. We usually prepare a batch of 1-2 kgs of dried chickpeas and freeze them in batches, whole or as a paste. If you want the chickpeas as a paste for recipes like hummus dip with lemon and tahini, cook the chickpeas a bit longer till they’re even softer then take them out of the pot, remove all their skins for an extra creamy paste, blitz them in a food processor while they are still warm then cool them down, place in ziplock bags and freeze. And then when you want to do hummus dips, you just get the hummus paste out, defrost it, and blend it with whatever ingredients you’re adding.

Grilled Eggplant Salad

This is a fresh summery Lebanese style eggplant salad that’s easy to prepare and makes a great addition to any BBQ and seafood dishes. This salad is originally known as ‘Raheb Salad’. It combines grilled smoky eggplants with fresh vegetables and nuts and is eaten with good fresh bread.

In this recipe, we’ll show you how to grill the eggplants in the oven. However, grilling the eggplants on a gas-stove top or over fire would give the salad a more intense smoky flavor. If you happen to have a gas-stove top, remove the hob, line the base with aluminum foil to protect it then return the hob (only the burner should be exposed). Then, prick the eggplants with a knife and grill them – turning them around every 15 mins – till the skin is nicely charred, burnt and soft. When the eggplants are done, put them in a bowl covered with cling film so the vapor would help peel the skin easier. Then peel, put in a colander to drain excess water and they’re ready to use.

We really hope you enjoy this salad as much as we do!

INGREDIENTS

  • 4 big eggplants
  • Salad ingredients
    • 1 cup green and red bell pepper, chopped
    • 1 cup de-seeded and chopped tomato
    • 0.5 cup pomegranate
    • 0.25 cup green onion, chopped
    • 0.25 cup parsley, chopped
    • 0.25 cup walnuts, coarsely chopped
    • 2 cloves garlic, finely minced
  • Dressing
    • 3 tbsp extra virgin olive oil
    • 2-3 tbsp lemon juice
    • 2-3 tbsp pomegranate molasses
    • 1 tsp cayenne pepper
    • 1-2 tsp salt
  • Garnish
    • generous drizzle extra virgin olive oil
    • walnuts, coarsely chopped (optional)
    • pomegranate seeds (optional)

METHOD

  1. Prick each eggplant 4 times with a knife making sure to go in deep with the knife at the bulkiest part of the eggplant. This helps release any bitterness from the eggplant while grilling.
  2. Place the eggplants on a roasting rack with a baking tray under to collect any liquid that will drip from the eggplants as they grill. 
  3. Place the eggplants on the medium rack and grill till the eggplants are soft and well charred, about 45-60 mins in a 250ºC oven. Flip them around half way through to cook the other side as well.
  4. When the eggplants are done, take them out of the oven and cut each in half, scoop the flesh out and put the flesh in a colander about 20 mins. This cools this eggplant flesh down and gets rid of any excess liquid that would water down the salad.
  5. After the eggplants’ flesh drained its excess liquid, place it on a cutting board and chop it up with a knife then place it a mixing bowl. Don’t chop too much. You want to keep some texture in the eggplants and not end up with a mush.
  6. Add your chopped bell peppers, chopped tomatoes (also de-seed them so they would not water down the salad), pomegranate, green onion, parsley, walnuts and garlic.
  7. Then add the extra virgin olive oil, lemon juice, pomegranate molasses, cayenne pepper and salt.
  8. Transfer to a serving bowl, add a generous drizzle of olive oil, garnish with coarsely chopped walnuts and pomegranate. Serve with good bread.

NOTES:

  • Pomegranate molasses is made traditionally by cooking sour pomegranates for a long time. The result is a thick and rich molasses that combines tartness with fruity sweet notes. You can buy this ingredient at most Middle Eastern or Turkish supermarkets. As with everything, there are many grades of pomegranate molasses with varying levels of tartness and sweetness. Therefore, use measurements are guidelines and always taste and adjust to your liking.

Grilled Green Broad Beans with Cumin and Lemon

This is a very simple and delicious snack of grilled green broad beans with cumin and lemon that we grew up having and buying off street carts in Southern Lebanon and wanted to share it with you guys today.

Broad beans, which are also known as Fava beans are in season usually sometime between April and September. That’s when you can buy them green – as opposed to dried. Try to buy the biggest pods you can get as bigger pods have bigger beans which are sweeter and tastier.

This snack is often served with local lemons that mostly resemble Sicilian lemons. As we live in London, Sicilian lemons are much easier to source, which is what we used here. Unlike regular lemons, Sicilian Lemons, which are also known as Siracusa lemons, have a thick white rind that’s also edible and quite delicious. These lemons are prized for their high juice content, high quality of essential oils as well as their unmistakable citrus zing that combines tartness with sweet notes. So try to find these if you can. Otherwise, just use the juice of a regular lemon without its rind. You can also serve this snack with carrots (peeled and cut into pieces) and corn (grilled or boiled on the cob then cut).

INGREDIENTS

  • 1 kg green broad beans in pods
  • 1 Siracusa lemon (optional)
  • Brine
    • 3 cups water
    • 2 tbsp salt
  • Seasoning
    • 2 tbsp lemon juice
    • 1.5 tsp cumin
    • 0.5 tsp cayenne

METHOD

  1. Remove the green broad beans from their pods. Put in a colander and wash. Then, place the washed beans on a baking sheet lined with parchment paper (this adds moisture to the beans and helps their skin pop open as they grill).
  2. Cook on the broiler setting on the highest heat of a preheated oven on the middle rack until the skin is charred, around 8-10 mins.
  3. When the first side gets nicely charred, flip to the other side and broil for another 8-10 mins.
  4. Prepare a brine of salt and water. Remove the beans from the oven and soak for about 30 mins in the brine.
  5. Remove the beans from the brine, add the seasoning and gently mix without breaking the beans.
  6. Transfer to a serving bowl.
  7. Cut the lemon into small pieces keeping most of its white rind but cutting away its yellow skin. Add the lemon pieces on the side.
  8. Season them with salt then finish off with a dash of cumin and cayenne and serve.

Roasted Eggplants with Tahini, Mint and Pomegranate

Today we’ll show you how to make this delicious grilled smoky eggplant drizzled with lemony tahini and topped with fresh mint, pomegranate and toasted buttery pine nuts. The fresh mint and the fruity tartness of the pomegranate cut through the richness of the eggplants, tahini and butter. This dish is fresh, colorful and mostly delicious!

INGREDIENTS

  • 2 medium eggplants
  • 1 cup fresh mint leaves
  • 1 pomegranate
  • Tahini sauce
    • 5 tbsp tahini paste
    • 3 tbsp water
    • 4-5 tbsp lemon juice
    • 1 tsp salt
  • In a saucepan
    • 3 tbsp butter
    • 3 tbsp pine nuts

METHOD

  1. Eggplants: Cut the eggplants in half right through the green stalk. With a knife, make a few incisions, without cutting through the skin. Repeat at a 45-degree angle to get a diamond-shaped pattern. Brush the eggplants generously with olive oil and sprinkle with salt and black pepper. Place the eggplants, cut-side up, on a roasting rack or a baking sheet lined with parchment paper for about 40 minutes in a preheated oven at 170 deg Celsius and roast them well until they are nicely brown, soft and their skin charred.
  2. Tahini Sauce: Put the tahini paste in a bowl. Add the water and start mixing. The tahini will thicken up and get grainy. Don’t worry, keep mixing and start adding the lemon juice slowly till you reach the desired consistency and tartness. The sauce should be rich, smooth, tart and creamy. Finally add salt, taste and adjust.
  3. Mint: Pluck out the leaves and set aside.
  4. Pomegranate: Remove the seeds and set aside.
  5. Assembly: When the eggplants are ready, drizzle the creamy tahini sauce on the eggplants. Tear and add the mint leaves. Top with the pomegranate. To finish off the eggplants, melt some butter in a small pan and toast some pine nuts, while stirring occasionally, until they are golden. Pour a spoonful of the butter and pine nuts on top of the pomegranate and serve.

Design a site like this with WordPress.com
Get started